4. Transcribing
Contents
- Transcribing in Annotation Mode
- Transcribing in Segmentation and Transcription Modes (Overview)
- Transcribing in Segmentation Mode
- Transcribing in Transcription Mode
- Transcribing over Multiple Tiers
- Adding comments
- Hiding/Revealing Tiers
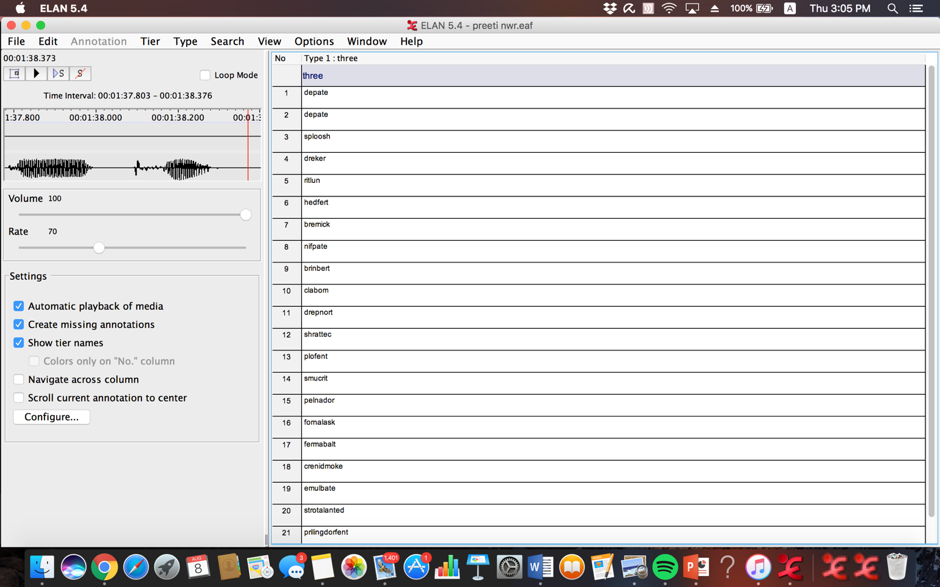
4.1 Transcribing in annotation mode
For a video version of this section, here is a video from our Youtube playlist on the same topic.
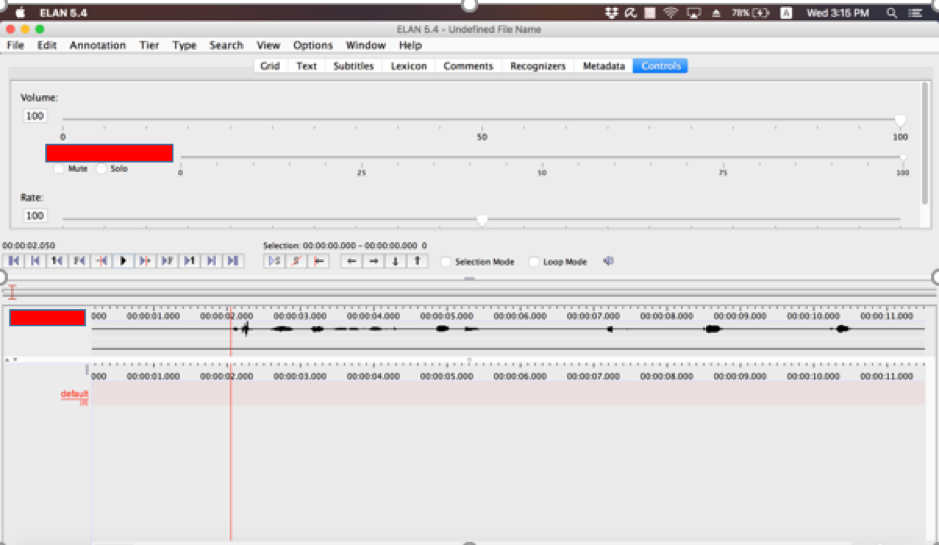
Click at the beginning of where you want to make the annotation, like so.
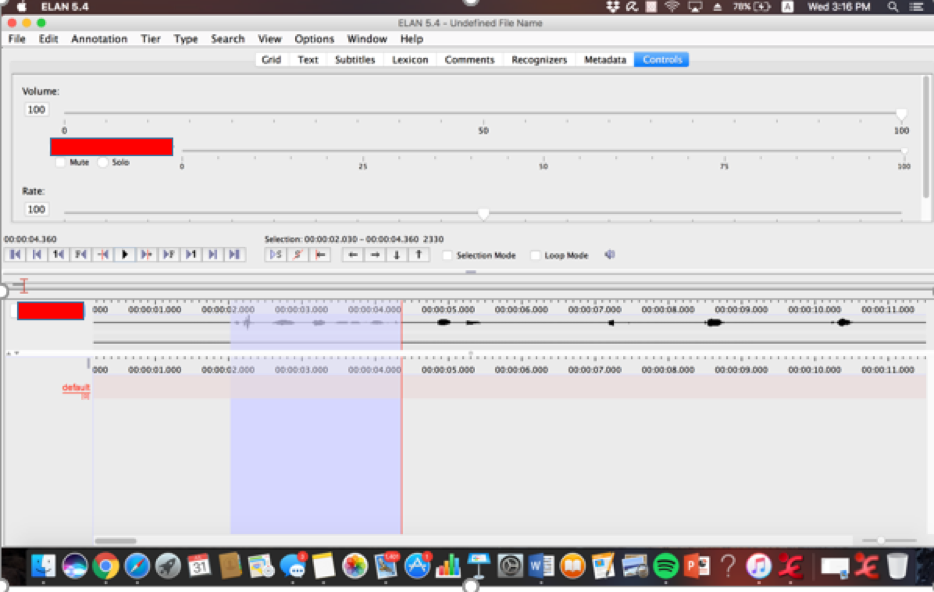
Drag the cursor over the sound waves you want to transcribe.
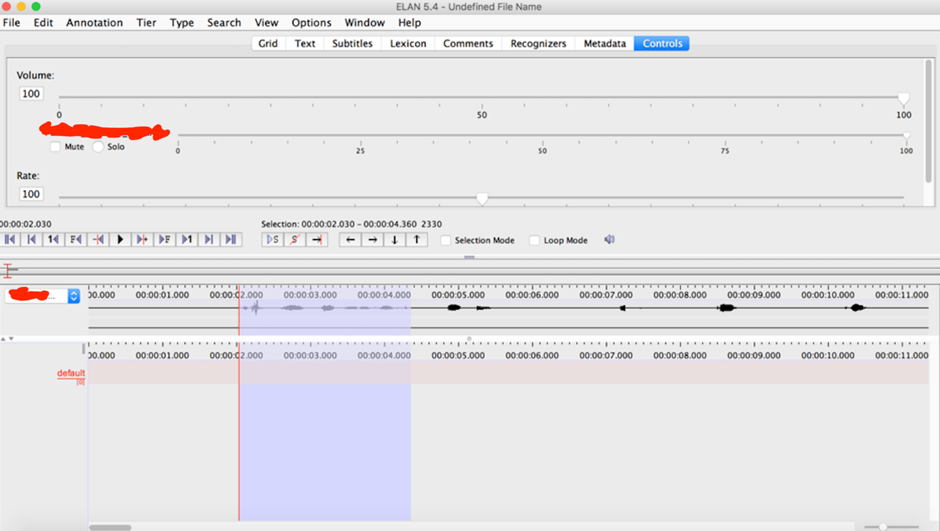
Double click on the first tier. A text box should appear, allowing you to transcribe what you hear.
Press enter after you are finished.

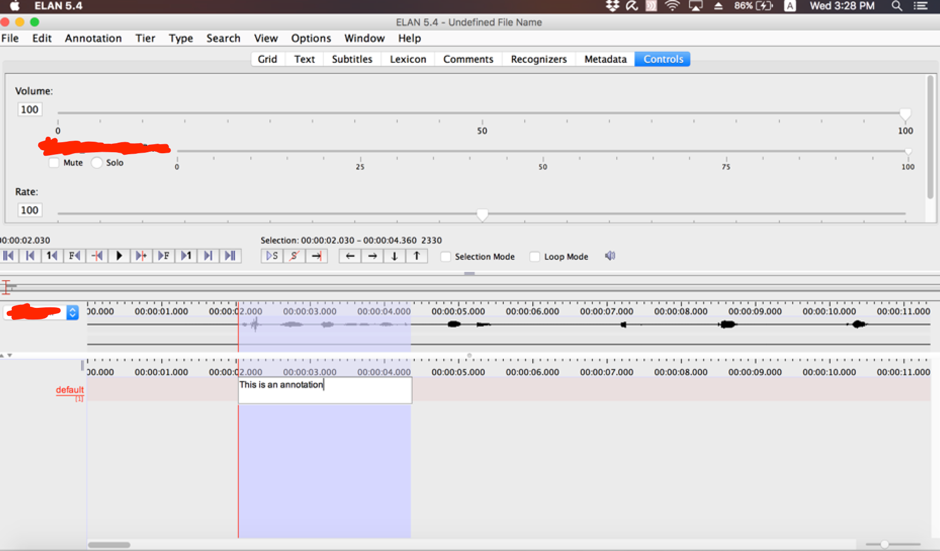
This is your completed annotation. You can double click on it to alter it. Delete it by right clicking it and selecting “Delete Annotation”
Back to table of contents
4.2 Transcribing in Segmentation and Transcription modes
For a video version of this section, see the Videos “Segmentation Mode (Part 1).mov,” “Segmentation Mode (Part 2).mov,” “Segmentation Mode (Part 3).mov,” and “Transcribing over Multiple Tiers.mov” embedded below.
For a video version of this section, view our videos from our Youtube playlist:
Annotations can also be created in Segmentation + Transcription mode.
Back to table of contents
4.2.1 Segmentation mode
Here is how you use Segmentation mode to create cells.
Note: You can only change the rate of audio playback in Annotation Mode. I recommend lowering rate of audio playback to 50-70 before attempting segmentation mode. It helps.
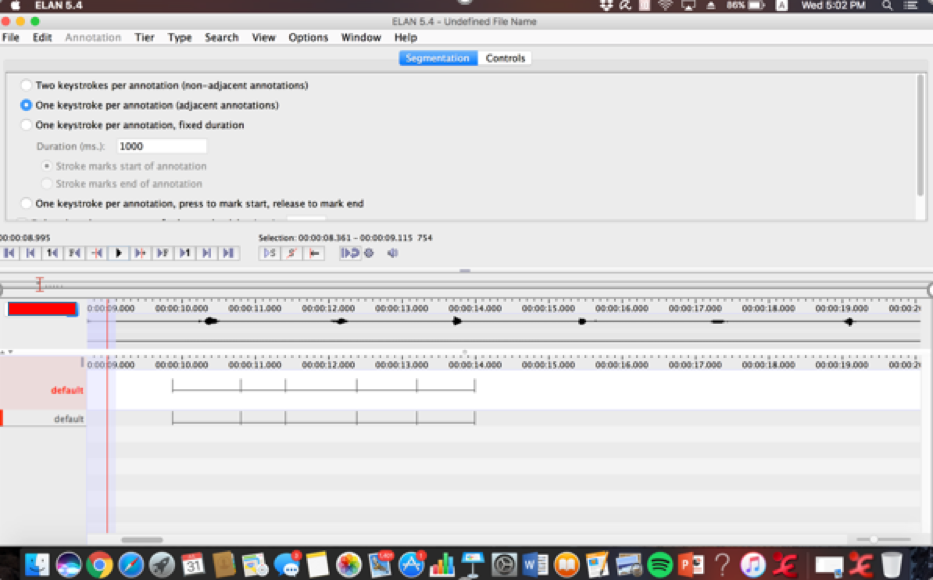
Press Enter to mark a cell boundary Press Spacebar to Play or pause.
Press enter to mark the first boundary of the cell. Press space to continue playing
Here you see the first boundary of the cell.
Press enter again to mark the second boundary. The annotation has been created.
Unlike in annotation mode, you cannot directly click the cell to transcribe in segmentation mode. You have to go to transcription mode for that.
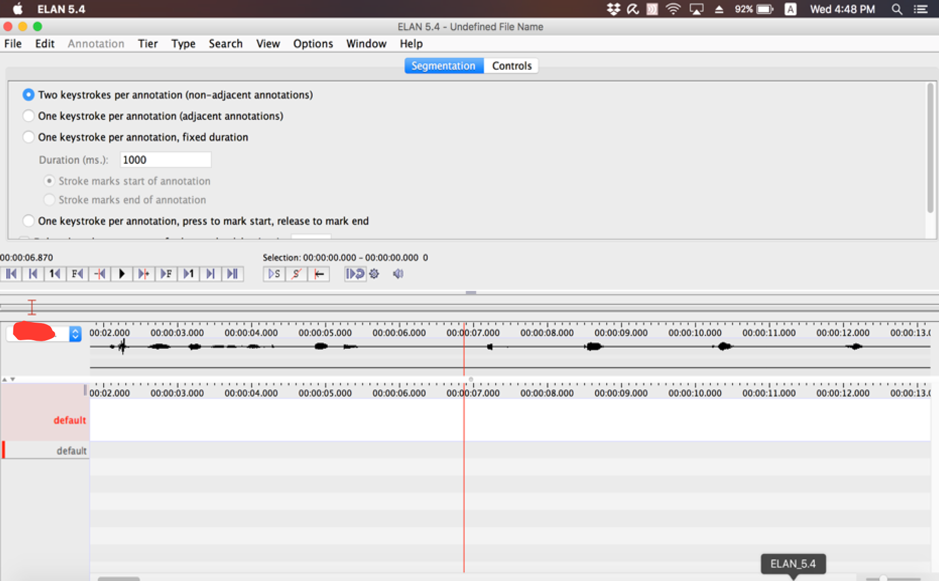
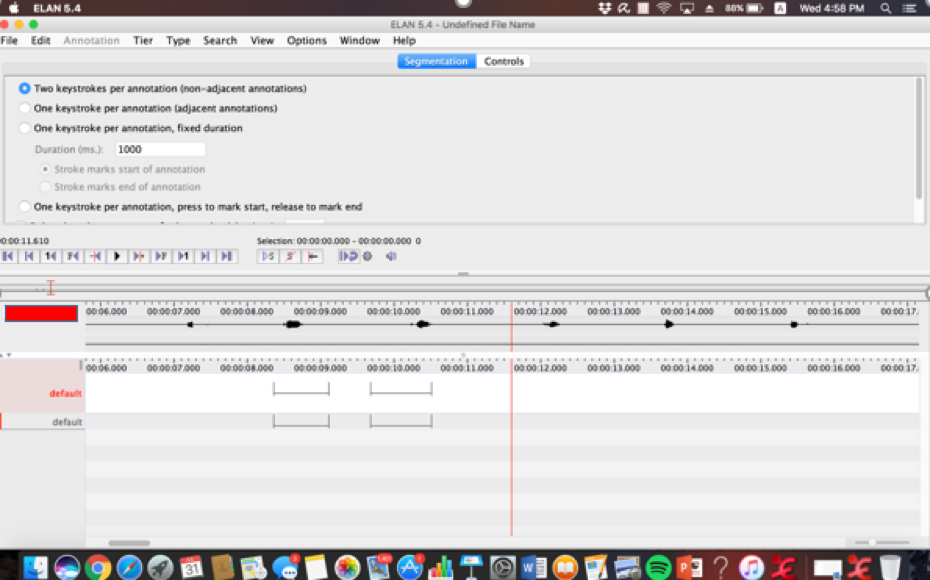
There is more than one transcription option in segmentation mode. They are shown in the space above the timeline. The options include: two keystrokes per annotation (non-adjacent annotations), one keystroke per annotation (adjacent annotations), one keystroke per annotation with a fixed duration, and one keystroke per annotation (press to mark start and release to mark end).
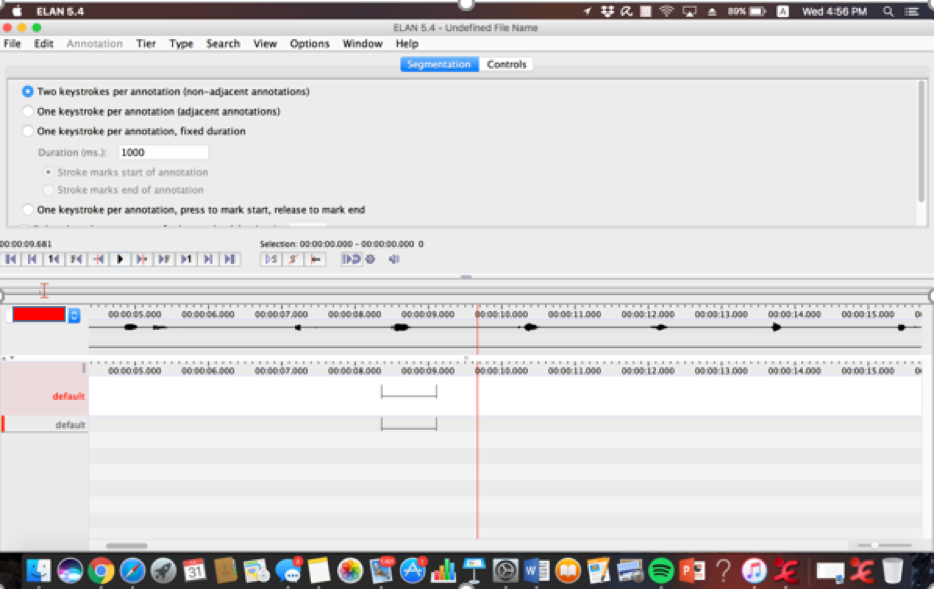
Adjacent annotation means the annotations occur continuously. As follows:
This is good if you want to transcribe individual words separately.
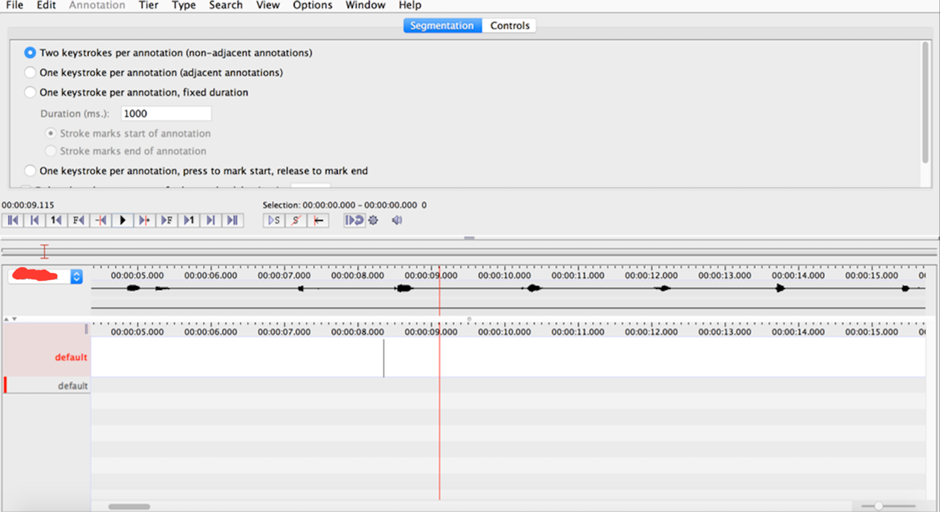
Compare adjacent annotations to the program in non-adjacent annotation mode. An example of non-adjacent annotations are shown below.
Regardless of which method to you choose to segment cells in segmentation mode, you have to go to transcription mode to annotate the cells.
Back to table of contents
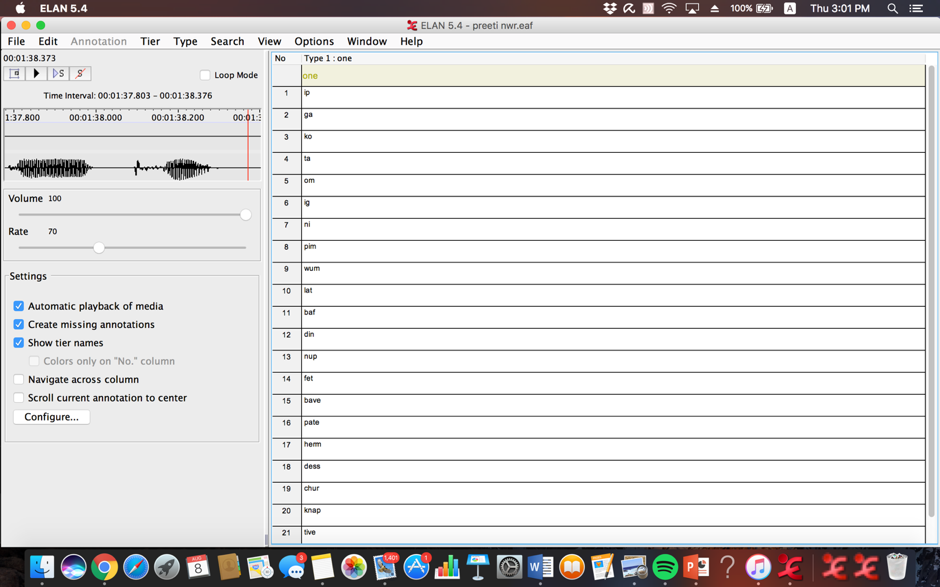
4.2.2 Transcription mode
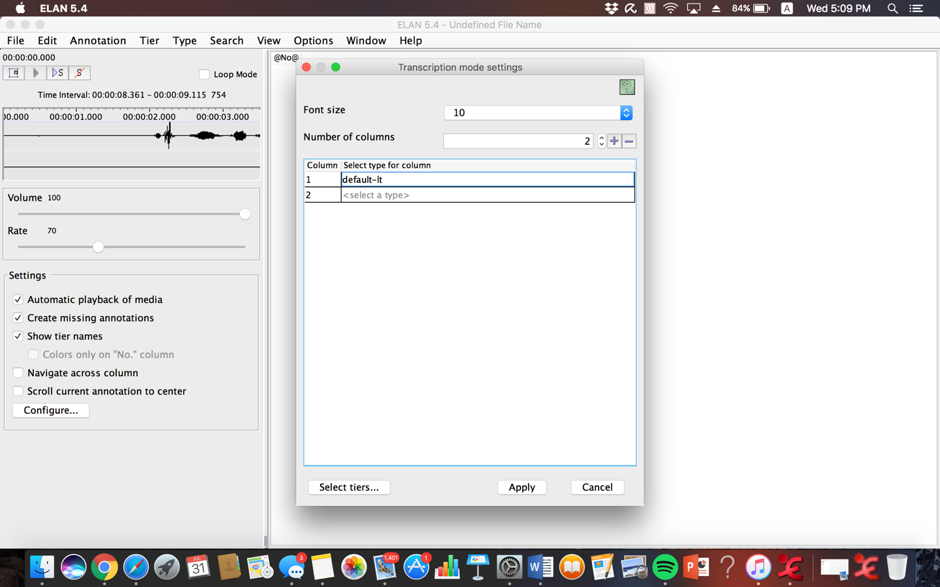
Click the cell that says “default-lt”, select the type of tiers you want to transcribe, then click “Apply”.
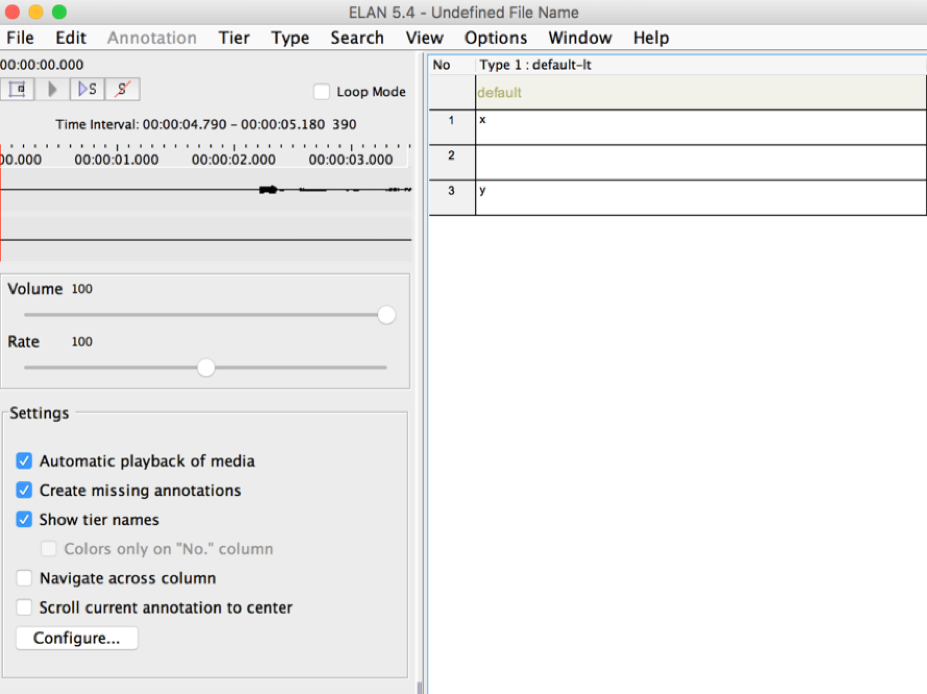
This is the resultant screen.
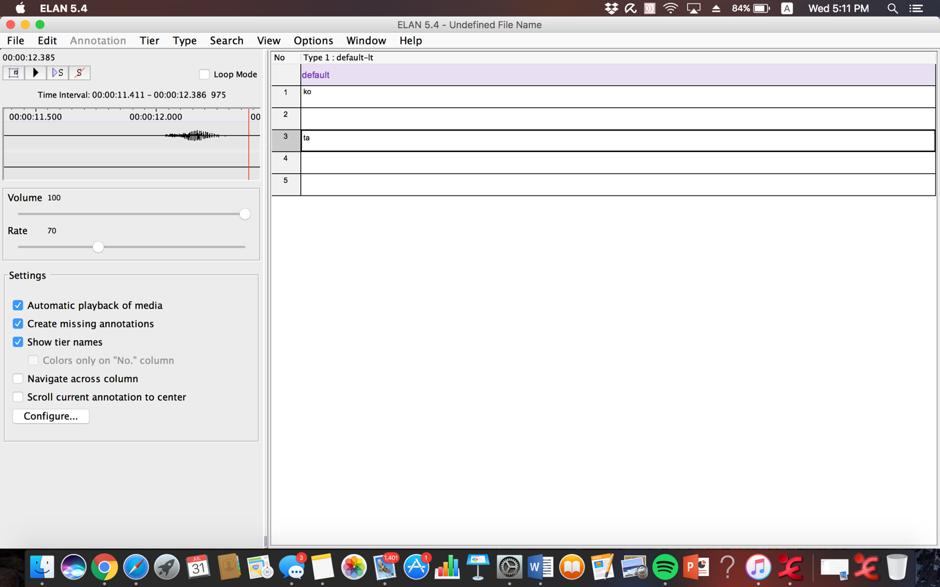
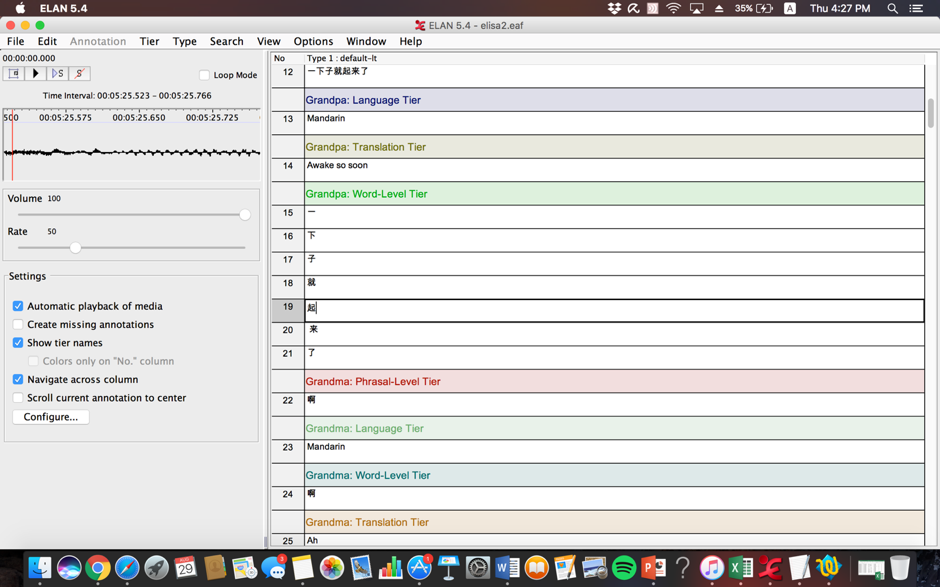
Click on each cell to transcribe. The sound clip that is encapsulated in the relevant cell plays as you click the cells in the table. As follows.
Back to table of contents
4.3 Transcribing over multiple tiers
It is straightforward to transcribe over multiple tiers on annotation mode.
Transcribing over multiple tiers on transcription mode is also simple, but you need to know how to do it.
Follow the following instructions.
If all the tiers are the same type:
The cells will all naturally show up in the same table, as follows. Just press enter to navigate from one cell to the other.
However, this may be messy, especially if the text involves a lot of overlapping.
If all the tiers are of different types:
Click “Configure” in the lower left corner.

Click the first cell under “Select type for Column”
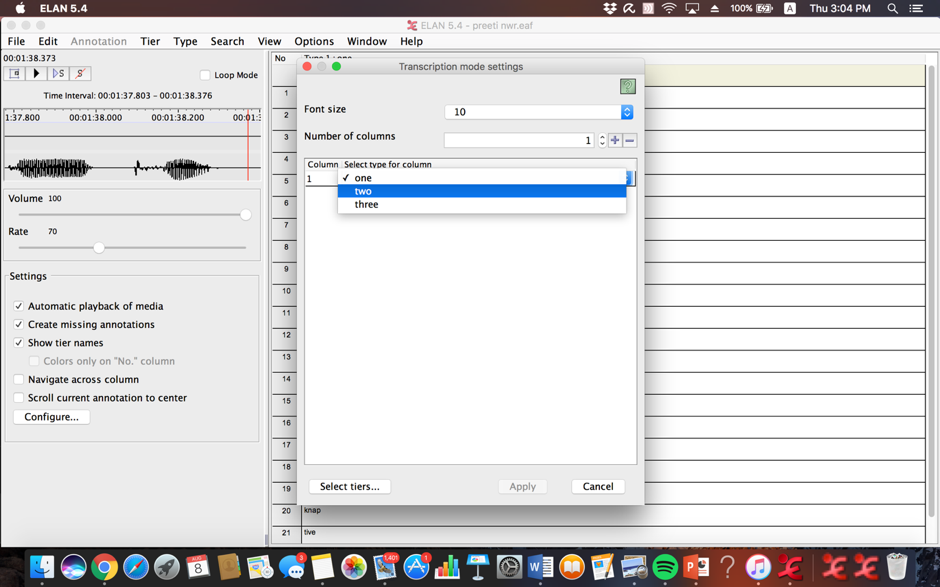
Select the tier type you want to transcribe.
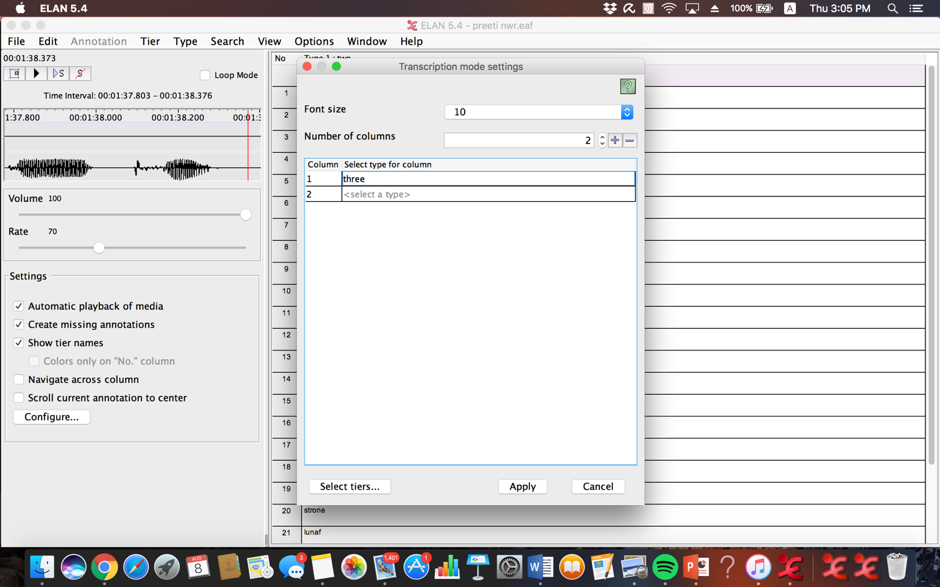
Click “Apply”
Done.
Back to table of contents
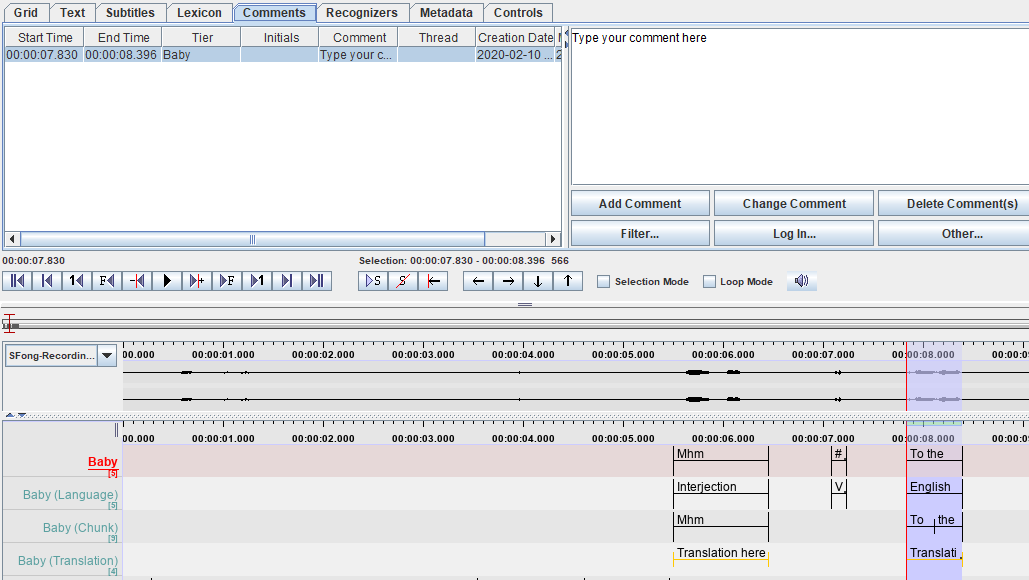
4.4 Adding comments
For a video version of this section, please watch the following video from our Youtube playlist here.
You may run into issues or have queries during the transcription process. Should that happen:
-
Click the “Comments” tab in display control and viewer toolbar.
-
Select a cell that you would like to comment on. Ensure you are on the correct participant tier (e.g., if you want to comment on a section on the “Baby” tier, ensure you have double-clicked on “Baby” on the left hand side and not another participant. You will know it’s properly selected if you see it red and underlined.)
-
Enter comment in the right-hand panel of the Comments tab.
-
Click “Add Comment” to add the comment. It should now appear on the left-hand panel of the Comments tab.
a. Need to edit your comment? Edit it, then press “Change Comment” to save the changes.
b. Need to delete your comment? Select the comment that you would like to delete, and then press “Delete Comment(s)”.
-
Enter your initials in the left hand “Initials” section, to allow the next transcriber/checker to know who had the query.
Once you have generated comments on the ELAN file, ELAN will automatically generate a separate file with a .eafcomment extension. This .eafcomment file contains all your generated comments on a given .eaf file.
Back to table of contents
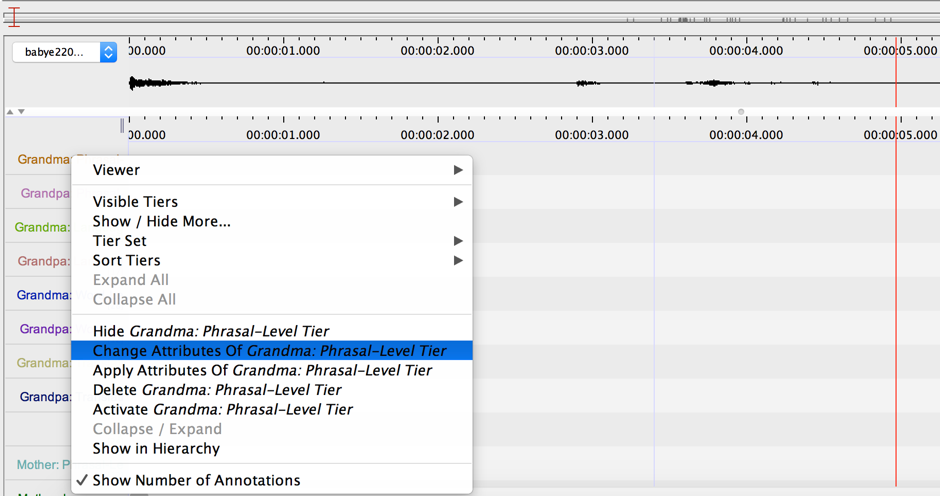
4.5 Hiding and revealing Tiers
To hide your tiers, just right click on the tier section and select ‘Hide tier_name’.
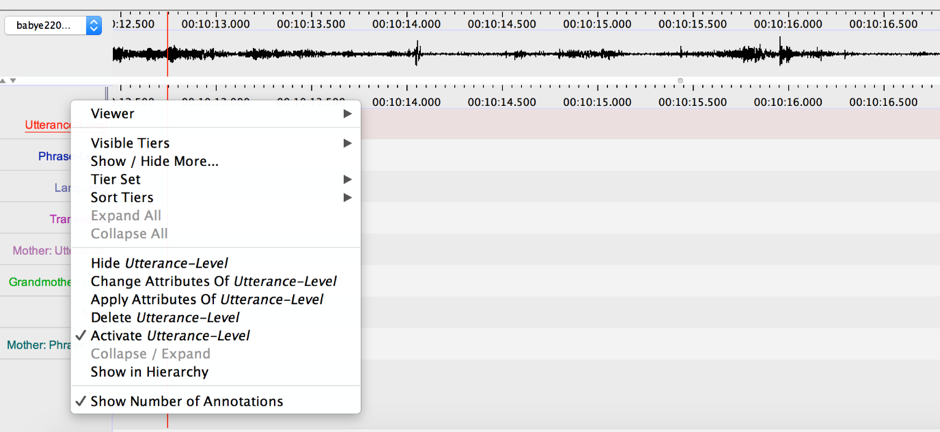
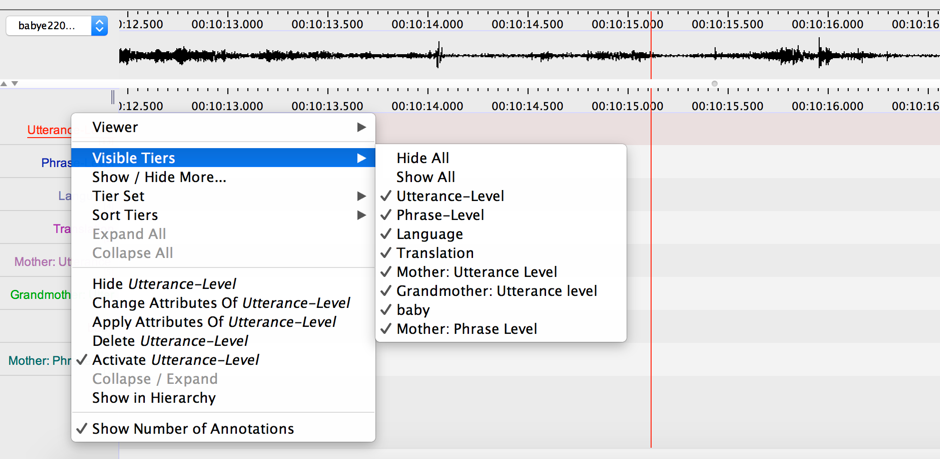
To hide or unhide any tiers, right click on the tier section and hover over ‘Visible Tiers’. Visible tiers will be have a check mark next to them, while hidden tiers will not.

You can also directly change the attributes of the tier by right clicking each tier and going to ‘Change Attributes of …”
Back to table of contents